Can a thoughtful plan turn a steep yard into usable space and keep your property safe? This guide answers that question with clear steps and practical advice. It focuses on why good planning matters more than flashy finishes.
Anchored Construction & Restoration has served East Tennessee for over 25 years. The team led by Knoxville native Travis Bullington brings commercial and residential expertise to every project.
Retaining structures resist lateral pressure from soil and water. Proper design starts with site analysis, soil testing, and smart drainage. Poor drainage is the number one cause of failure; a clean gravel backfill, landscape fabric, and a perforated drainpipe are essential.
This section sets expectations about scope, safety, and permits. Many jurisdictions require engineered plans for walls over four feet. A slight backward lean improves stability, and material choice affects cost and appearance.
Call 811 before digging and check local codes. The guide that follows walks readers from measuring the slope to preparing a compacted base and placing drainage so their landscape stands the test of time.
Key Takeaways
- Start with a site and soil assessment before any planning.
- Drainage control matters more than the visible finish.
- Confirm permits and engineering for taller structures.
- Choose materials based on durability and landscape goals.
- Anchored Construction & Restoration offers local expertise in East Tennessee.
Why building a retaining wall on a slope demands a plan-first approach
Smart preparation is the difference between a lasting structure and early failure. Anchored Construction & Restoration applies 25+ years of East Tennessee experience to front-load decisions that reduce risk and cost.
A retaining wall must resist lateral earth pressure from soil and water. Engineers start with site analysis, soil testing, and groundwater assessment. Poor drainage leads to saturated soil and frost heave, the most common cause of failure.
-
- Define goals, constraints, and the wall’s role in the larger landscape.
- Document slope angle, soil type, and water paths.
- Identify roots, utilities, and access early to avoid delays.
-
- Design that controls water lowers pressure on the structure.
- Extend bases below frost depth or use well-drained gravel in freeze zones.
- Plan permitting milestones near property lines or driveways.
-
- Follow a clear sequence: excavate, base, first course, drainage, backfill.
- Match materials to performance and aesthetic goals.
- Bring an engineered plan for complex sites to avoid guesswork.
Good planning keeps the project on budget and helps the walls perform for decades.

Site assessment and planning basics for sloped yards
A careful survey of angle, soil, and water gives a project a solid start. Anchored Construction & Restoration helps Knoxville homeowners evaluate slopes, set reference lines, and align plans with local permits.
Measure slope and set level control. Place stakes, run a string line between them, and use a level to create a reliable line. Measure vertical drop against horizontal run to quantify the slope that the wall must resist.
- Establish benchmarks and offsets so every course and the base reference the same level.
- Perform a jar test to check soil composition; clay holds water and raises pressure, sandy soil drains faster.
- Watch water during a storm to map runoff, pooling, and natural outfalls for proper drainage planning.
- Call 811 before any digging and confirm local permits; many towns require paperwork for walls over three to four feet.
- Document access for equipment and plan erosion controls like silt fence during the project.
Practical support: Anchored Construction provides site assessment, layout, and permitting guidance, and coordinates excavation and gravel delivery so the yard is protected and the ground work proceeds smoothly.
Safety, codes, and wall height: what DIYers must know
Knowing permit triggers and foundation depth prevents costly rework and unsafe results.
Local rules set thresholds that affect every project. Many jurisdictions require engineered plans for any retaining wall over four feet or for walls that support surcharges. Exceeding the allowed wall height often starts a permit review.
Foundations must reach below the frost depth in freeze–thaw climates. Where frost reaches the soil, a deep, free‑draining gravel base prevents frost heave and reduces lateral pressure on the wall.
- Verify local limits and setbacks near property lines and foundations.
- Identify surcharges like driveways or pools; they add pressure and may require geogrid or reinforcement.
- Consider tiered walls for steep sites; multiple lower walls often outperform one tall wall.
- Use a consistent batter (about 1 inch per 12 inches) to lean the wall into the slope for stability.
Plan inspection milestones for base prep, drainage installation, and final grading. Anchored Construction & Restoration secures permit‑ready documentation and coordinates inspections in East Tennessee so homeowners stay compliant and safe.
Choosing the right retaining wall type and materials
The right system balances appearance, lifespan, and site demands for long-term success.
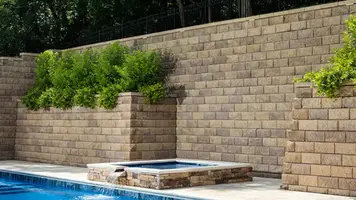
Segmental blocks are mortar-free and modular. They fit curves and offer textured faces. For taller installations, follow the manufacturer’s geogrid and pin specs.
Pressure-treated wood gives a warm look at a modest cost. Use quality lumber with deadmen tiebacks and plan for shorter service life. Good drainage and preservatives (ACQ/CA) extend performance.
Natural stone or brick raises curb appeal. Mortared masonry needs a proper footing and drainage to avoid frost heave. Dry-stack stones relieve pressure and can work well in many landscapes.
Poured concrete delivers maximum strength where soil or loads demand an engineered solution. Expect reinforcement, control joints, and professional placement.
- Match materials to height, soil, and budget.
- Protect the base with clean drainage and gravel.
- Plan staging for block, stone, or wood deliveries.
Anchored Construction & Restoration installs segmental block, timber, stone, and concrete systems and pairs each with proper drainage and reinforcement for East Tennessee sites.
Drainage and base fundamentals that prevent wall failure
Effective drainage and a stable base are the most reliable defenses against premature wall failure. Anchored Construction & Restoration installs drainage assemblies correctly the first time to safeguard investments and cut maintenance for Knoxville homeowners.
Place a 4-inch perforated PVC pipe at the heel of the wall and pitch it toward a daylight outlet or dry well. The pipe must slope so water flows freely and cannot freeze or clog.
Wrap clean, angular gravel with landscape fabric to keep fines out of the drainage zone. Compact gravel in lifts so the base bears evenly and resists settlement.
- Grade top backfill so surface water sheds away at about 1 inch per 4 feet.
- Set the base below the frost depth or provide a deep, free-draining gravel layer in cold climates.
- Avoid placing excavated clay directly behind the wall; replace with free-draining material where specified.
Provide weep paths and protect outlet locations with screens. These simple steps control water and soil pressure and greatly reduce the risk of wall failure.

How to build retaining wall on slope: step-by-step process
A precise construction sequence turns plans into a stable, long-lasting structure.
Excavate and prepare a level, compacted gravel base
Excavate to the plan line and reach competent subgrade. Remove organic material and soft spots.
Place crushed stone and compact in lifts. Check the base level often to avoid compound errors.
Set the first course perfectly level and partially buried
Set the first units dead level and slightly below final grade. This locks the face and resists sliding.
Stack courses with staggered joints and a slight batter
Stagger joints like brickwork and lean the wall back about 1 inch per 12 inches. Small offsets improve stability.
Integrate geogrid or deadmen where required by design
Install geogrid at specified elevations for block systems. Use deadmen or tiebacks for timber where plans call for them.
Backfill with clean gravel in lifts and compact as you build
- Backfill in 6–8 inch lifts with clean gravel and compact each layer.
- Place a 4-inch perforated pipe at the base and pitch it to a safe outfall.
- Wrap drain gravel with fabric to keep fines out and protect flow.
- Cut and fit caps, adhere where specified, and pitch them to shed water.
- Finish top grading and stabilize exposed soil with mulch or vegetation.
- Minimizes yard disruption: Sequence work for efficient access and deliveries.
- Meets specs: Compaction, alignment, and drainage checks at each step.
- Long-term performance: Proper base, drain, and backfill control pressure and moisture.
Anchored Construction sequences work to minimize disruption while meeting compaction and alignment requirements. Perform a final level and outlet check before demobilizing to ensure the retaining wall performs as designed.
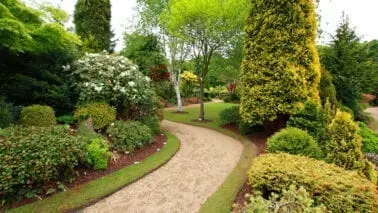
Slope-specific design solutions that add stability and usability
Terracing turns steep grades into a series of useful, lower-height segments that are easier to manage and maintain.
Terracing uses multiple shorter walls to spread loads and create flat, usable spaces. Anchored Construction creates terraces, steps, and landings that transform challenging hillsides in East Tennessee into outdoor rooms.
Terracing steep slopes to distribute loads and create level spaces
Short tiers reduce lateral pressure and make gardening, patios, and access safer. Each level can have its own drainage and planting bed.
Cut vs. fill vs. cut-and-fill: choosing the right approach
- Cut: Place the unit into the incline when the upper material is stable and less earth needs moving.
- Fill: Build at the low side and backfill when you need a raised platform with compacted soil.
- Cut-and-fill: Balance earthwork by moving material downhill for efficient site work.
- Design notes: Respect spacing between tiers, adapt height per soil conditions, and include drainage so water does not cascade down lower levels.
Anchored Construction designs terraces that hold back soil while creating attractive, usable landscape areas. Reinforcement, stairs, and safety features are tailored to each project’s needs.
Engineering principles in plain language
Basic engineering turns unseen forces into clear choices for foundation, drainage, and reinforcement. This section explains key checks engineers run so homeowners can understand why certain details matter.
Understanding lateral earth pressure, sliding, and overturning
Engineers calculate lateral pressure caused by soil weight and water behind a retaining wall. They then check sliding, overturning, and bearing capacity.
Sliding depends on base friction and how well the footing keys into compacted gravel or native soil. Overturning is resisted by the mass and setback of the structure and any buried reinforcement.
When soil, water, and climate require reinforced designs
- Pressure control: Geogrid, tiebacks, and anchored systems add resistance where soils are weak or height increases.
- Drainage first: Water greatly raises lateral pressure; drains and outlets cut hydrostatic loads.
- Foundation checks: Bearing tests ensure the foundation will not settle; frost depth guides base placement in cold climates.
Anchored Construction & Restoration partners with engineers for geogrid specs, concrete details, and permit-ready plans when site conditions demand a reinforced approach homeowners can trust.
Maintenance practices to maximize wall lifespan
A simple annual checklist helps spot shifts, blockages, and erosion early. Regular attention preserves function and saves money over time.
Inspect yearly and after storms. Walk the length and watch for bulging, cracking, or leaning. Photograph changes so small movements are tracked.
Key inspection items
- Verify drainage outlets run free and clear clogs so water cannot build behind the face.
- Check the top grade and add soil where settlement or erosion created low spots.
- Restore surface gravel and repair any exposed fabric that could let fines migrate into the drain layer.
- Keep heavy loads away from the top and trim plantings; avoid deep roots near structures.
- For timber, monitor fasteners and treated cuts; for masonry or concrete, apply sealants as recommended.
Common fixes: Clear drains, regrade to shed runoff, and add compacted gravel or soil where needed. Small repairs done promptly prevent larger failures.
Anchored Construction & Restoration offers inspections, repairs, and drainage improvements for Knoxville homeowners. Routine care extends service life and keeps projects performing well over time.
When to hire a pro in the United States—and how Anchored Construction can help
Projects with high water tables or unusual loads should start with an expert assessment and engineered plans.
Hire a pro when the site is complex, the wall exceeds local height limits, or groundwater sits behind the slope. Professional engineering is typically required for walls over four feet, tiered systems, poor soils, or when surcharges exist.
Complex sites, walls over four feet, and high water tables
These conditions change the loads and the foundation needs. Licensed engineers provide stamped drawings that show reinforcement and drainage layouts.
Engineered plans, geogrid specs, and permit-ready documentation
Expect geogrid schedules, wall sections, and construction sequences. Proper docs speed permitting and inspections. Coordination with inspectors reduces delays.
Anchored Construction: retaining walls, hardscapes, excavation, and concrete — (865) 316-6933 | Info@anchoredconstructiontn.com
- Turnkey solutions: survey layout, excavation, reinforcement, and water management under one roof.
- Experienced team: Founded in 2000 and led by Knoxville native Travis Bullington, the company delivers landscape, concrete, and hardscape services.
- Project support: Excavation and concrete specialists ensure safe digs, reliable bases, and proper foundation bearing.
After 25+ years, Anchored Construction reduces risk, avoids rework, and protects your landscape investment. Call (865) 316-6933 or email Info@anchoredconstructiontn.com to schedule a site visit and plan your next retaining wall project.

Conclusion
A good design turns an awkward grade into usable outdoor rooms that last for decades.
Durable retaining wall performance starts with sound site analysis, a compacted base, and reliable drainage. Control soil and water early. Match materials to loads and the landscape’s look. Use terracing or engineered reinforcement when heights and surcharges increase pressure.
Follow a clear sequence: base prep, level first course, staggered joints, batter, reinforcement, and compacted backfill. Maintain the finished wall with seasonal checks and quick fixes to extend service life.
Anchored Construction & Restoration stands ready in East Tennessee to turn steep yards into beautiful, usable places. Call (865) 316-6933 or email Info@anchoredconstructiontn.com to discuss your project and next steps.