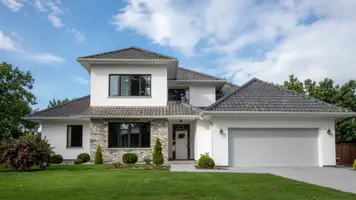
Looking to transform sloped land into safe, usable outdoor space with lasting curb appeal?
Anchored Construction & Restoration has served East Tennessee since 2000 under Knoxville native Travis Bullington. The team brings over 25 years of experience on residential and commercial projects.
This guide explains how a well-planned retaining wall and fence system improves safety, privacy, and usable yard area. It covers practical design steps, material choices, drainage basics, and local code triggers like guard requirements for walls over 30 inches.
Readers will learn when a combined system is needed, how site conditions in Knoxville affect sequencing, and why professional input is highly recommended for code compliance and long-term performance.
To discuss a specific project, call (865) 316-6933 or email Info@anchoredconstructiontn.com for prompt expert advice.
Key Takeaways
- Well-designed systems boost safety, privacy, and curb appeal.
- Planning for loads and drainage ensures long-term performance.
- East Tennessee soils and weather affect design choices.
- Anchored Construction offers 25+ years of local expertise.
- Professional help is highly recommended for code and structure.
Understanding the retaining wall and fence connection
A smart exterior plan pairs a sturdy base with a finishing barrier to control soil and shape usable outdoor rooms. Anchored Construction educates homeowners so you can make confident choices that boost value and livability.
What each part does
The primary job of the base is to resist lateral earth pressure and hold the higher soil behind wall sections. That function prevents erosion and keeps slopes stable.
The visible barrier creates fall protection, adds privacy, and deters access. It is not meant to carry earth loads.
Why they work better together
- Combining elements raises safety for children and pets near grade changes.
- Coordinated design improves privacy near patios and increases security along property lines.
- Different types of structures are chosen for site loads, appearance, and longevity.
Preserving structural integrity means the connection must not transfer soil loads into posts. Proper drainage layers, geotextile, and gravel backfill behind wall components must stay intact when adding a top barrier.
Property owners should consider sightlines, wind exposure, and neighbors when choosing height and style. Local codes will guide where guards are required and how attachments are made.

Can a fence replace a retaining wall?
Not every build meant to stop soil can be solved with a quick fence fix. A true retaining wall is engineered to resist lateral earth pressure, manage drainage, and survive freeze/thaw cycles.
Key structural differences and risks
Why a fence cannot replace a retaining wall: posts and rails lack footings, mass, and reinforcement. They are not designed to resist saturated soils or hydrostatic pressure. Misuse invites leaning posts, warped rails, and failure.
When kickboards/rot boards help and when they don’t
Kickboards can keep loose soil off lower panels for short-term, small fills. They do not add the footing, drainage, or reinforcement a true retaining wall provides.
- Risk factors: erosion, hydrostatic pressure, and freeze/thaw cycles can push a fence over.
- Even heavier material choices lack the footing and mass for earth loads.
- For slopes beyond a few inches, consult an engineer; you may need a retaining wall for safety and structural integrity.
Anchored Construction highly recommend engineered solutions that last rather than quick fixes that fail. Use each element for its intended purpose to protect value and reduce future repairs.
When you need a retaining wall fence on your property
Steep grades, sliding soil, or ponding spots can signal the need retaining wall solutions on your property. Anchored Construction helps East Tennessee homeowners evaluate yards, slopes, and use of space to decide when a combined approach is right.
A guard placed on top of a base is common where patios, play areas, or walkways sit close to an edge. These setups improve safety, add privacy, and increase usable outdoor space while addressing erosion behind wall sections.
Typical triggers that you may need retaining work include sliding soil, water pooling at the foot of a slope, or trouble keeping turf healthy on an incline. Differences in neighbor grades also make a paired solution attractive: the base manages soils while the fence provides screening.
- Patios or play areas near an edge where a guard is required for safety.
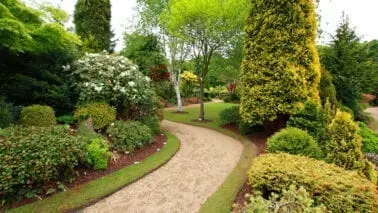
- Terraces that create a level yard and reclaim space for outdoor living.
- Steep driveways, steps, or narrow walks needing added protection.
- Visible sliding soil, ponding, or erosion behind wall zones.
- Privacy needs that drive height choices while site conditions set base type.
- Code-driven guard rules at level changes—site review confirms requirements.
- Plan for future expansions so the combined wall fence integrates with decks or paths.
- Match goals—more usable space, better screening, safer elevation transitions.
- Schedule an on-site assessment to align function, budget, and appearance before the project begins.
Safety and code basics property owners should know
Anchored Construction educates clients on permitting, inspections, and safe practices so families and investments stay protected. Clear rules determine when guards are mandatory and when an engineer must review the design.
Guard requirements over 30 inches and fall protection
The International Building Code 1015.2 requires a guard when a retaining wall exceeds 30 inches next to a walking surface. Guards focus on fall protection, not on holding soil.
Design must allow secure attachment without undermining the base. Even lower levels near stairs or patios may benefit from a protective guard.
Engineer review to protect structural integrity
An engineer should verify attachments, post spacing, and load paths so the structure is not compromised. Inspections may be required by the municipality depending on the scope of work.
- Document specifications for future maintenance and additions to the project.
- Discuss wind exposure on elevated terraces before final design.
- Know the difference between handrails or guards and privacy fencing; attachment details matter.
Anchored Construction can guide permitting, scheduling, and inspections so the job proceeds efficiently and safely.
Plan first: lines, slopes, and drainage on site
Before a shovel hits dirt, verify lines, depths, and drainage on the site. Anchored Construction begins every project with a site check to avoid utility conflicts and to set accurate elevations for lasting results.
Locate property lines, mark utilities, and confirm frost depth before excavation starts. Measure slope angles and test soil to define wall geometry and to predict lateral earth pressure.
Property, utility, and frost lines to verify before digging
- Set finish elevations that align with doors, patios, and level lawn areas.
- Design a drainage plan using a fabric-wrapped perforated pipe at the base with clean gravel to reduce water pressure and prevent clogs.
- Address erosion risks on steeper grades with robust backfill, compaction testing, and step-ups in the base course.
- Preserve space for access, plantings, future work, and maintenance; small layout edits prevent costly rework.
Schedule around weather to protect excavations and subgrade quality. Careful planning is highly recommend to ensure system performance and to avoid surprises on the project.
Choosing materials that fit your design and budget
Choosing the right build materials shapes how a yard performs, looks, and lasts over time.
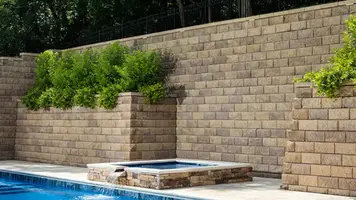
Hardscape options include concrete blocks, masonry stone, brick, or large boulders. Interlocking concrete blocks speed construction and reduce labor costs. Natural stone and brick give a higher-end look but raise the price and maintenance needs.
Top barrier choices pair metal posts with wood, PVC, or composite panels. Metal posts provide strength while lighter infill keeps loads off the base. That approach helps coordinate a wall fence without overloading connections.
- Compare different types by strength, cost, and upkeep.
- Use pavers to match steps and patios for a seamless look.
- Choose caps and trim that shed water and protect edges.
- Mix premium faces with economical core units for budget balance.
Color will shift over time. Sealants slow fading in sun and rain. Anchored Construction helps you weigh options, balance cost and appearance, and pick materials that suit East Tennessee climate and your long‑term goals.

Tools and equipment you’ll need for building retaining wall
Assembling the proper gear before work begins keeps schedules on track and quality high. Anchored Construction supplies crews with the right tools to keep a project moving and to protect materials on site.
Layout and measuring essentials
Accurate lines and elevations start with quality measuring gear. Use measuring tapes, chalk, mason line, stakes, and levels to set strings and verify grades.
Excavation and compaction gear
Clear sod and dig the base with shovels, sod cutters, and trenching tools. A plate compactor or rented rammer creates a dense base that carries loads without settling.
- Cutting and drilling: circular saw with masonry blade, drilling hammer, chisels for blocks and post plates.
- Mixing: mortar, concrete sand, caulk gun, bucket mixers for bedding and adhesives.
- Safety: hard hats, eye protection, dust control when cutting masonry materials.
- Staging: keep gravel, blocks, and concrete near the work zone to reduce handling time.
Rent specialty equipment when it speeds the job and lowers labor costs. Use a checklist before building retaining wall courses to ensure consistent, clean results.
Design options: privacy, security, and style
Good design balances sightlines, safety, and style so a yard feels intentional and inviting. Anchored Construction guides homeowners through choices that match architecture and site conditions.
Horizontal vs. vertical infill looks
Horizontal slats make a space feel wider and modern. They also lower the perceived height of a barrier.
Vertical slats draw the eye up, adding formal height and a classic look. Metal posts with wood or composite infill material give long life while keeping the load off the base.
Blending walls, fences, and hardscape features
Combine elements to form a cohesive outdoor system. Align lines with windows and doors for rhythm from house to yard.
- Orientation: Compare horizontal versus vertical panels to set the overall look.
- Materials: Wood, PVC, and composite panels balance durability and upkeep.
- Performance: Choose fence options that tradeoff airflow, privacy, and security based on use.
- Proportion: Size the wall fence segments so each part reads intentional and balanced.
- Details: Add mixed textures, color bands, and caps to elevate the finish.
Anchored Construction tailors design options to Knoxville properties. Homeowners get solutions that protect sightlines, add privacy, and enhance curb appeal while fitting HOA rules and budget.
Mounting methods for a wall fence on concrete
Mounting posts to concrete requires choices that balance strength, appearance, and long service life. Anchored Construction prioritizes secure anchors that protect the base and extend service life.
Surface-mounted posts: Use base plates with concrete-rated fasteners when the top is at least 12 inches wide. This method is fast to install and easy to service.
Face-mounted brackets
Face-mounted plates attach to the side where top space is limited or when a clean top is desired. They keep the top area unobstructed while still providing solid support.
Embedded and core-drilled posts
Embedded sleeves set during a pour give maximum strength and clean alignment. Core-drilling installs posts into existing concrete at a top of roughly 12 inches. Both lower movement under heavy infill material and wind loads.
- Minimum top width targets a wall least 12 inches for surface or cored posts.
- Seal penetrations and use corrosion protection to preserve integrity over time.
- Infill material weight and wind exposure influence post spacing and embedment depth.
- Choose a standardized fence system to simplify parts, installation, and repairs.
Each option has tradeoffs in speed, appearance, and future serviceability. Consult local code and an engineer before work; professional guidance is highly recommend.
Solutions for segmented retaining walls (SRW)
C. “Installing posts near modular blocks demands strategies that shift loads away from the visible units.”.
Segmented block systems are not designed to carry lateral loads from posts. Attaching a post directly to face units can stress blocks, void manufacturer guidance, and shorten service life. Anchored Construction uses alternative methods that protect the face units while giving a secure top barrier.
Sleeve‑It cantilever anchors
The Sleeve‑It system mounts a short anchor near the top course. A post slips into a sleeve that transfers loads into compacted backfill behind the units.
Benefit: Loads bypass the blocks and rest on engineered soil, preserving system integrity.
Post‑iN hollow‑core anchoring
Post‑iN uses hollow cores in block units. Posts extend into cores and tie to a buried counterweight slab behind the line.
This reduces the gap between barrier and face while keeping structural forces away from the visible blocks.
- Install anchors as courses rise and before final backfill.
- Spacing, post size, and height depend on soil and exposure.
- Check compatibility with the specific block system used.
Note: Preserving the system’s integrity is paramount; engineering review is highly recommended. A coordinated fence system streamlines layout and recovers usable top space while protecting the blocks behind wall units.
Drainage and backfill: protecting structural integrity
Effective drainage keeps soil pressures low and structures standing through seasons. Anchored Construction builds drainage into every project to prevent costly failures and to extend lifespan.
Proper pipe placement and fabric wrap
Place a fabric-wrapped, perforated pipe at the heel near the base to collect groundwater. Wrap the pipe in filter fabric so fines do not clog the perforations. Set outlets so collected water leaves the site safely without undermining nearby features.
Gravel backfill to relieve lateral pressure
Use clean, angular gravel directly behind the face to promote flow and reduce hydrostatic forces. Gravel placed in compacted lifts builds a stable mass without loading the visible face. Filter fabric separates fines from the drainage layer to keep performance steady over time.
- Step up base and drain lines where grades change to keep flow continuous.
- Compact backfill in controlled lifts to limit settlement and movement.
- Check weep points and outlets after heavy storms to verify function.
Sound drainage is one of the best investments in long-term integrity. Document as-built drainage locations so future landscaping or irrigation work behind wall areas avoids surprises.
Step-by-step: how to build retaining wall and fence together
Start with a firm, level base and the rest of the project stacks up cleanly and reliably. Anchored Construction follows a proven sequence to keep trades coordinated and finishes neat.
Base prep and leveling for the wall
Lay out alignment and excavate to depth. Place and compact base aggregate. Screed a level bedding layer so the first course sits flat.
Block stacking or formwork, then post installation
Stack modular blocks with consistent setback, checking plumb as the build rises. Modern segmented units allow mortarless stacking with engineered interlock.
Install drainage pipe at the heel and add clean gravel behind each lift to relieve hydrostatic pressure. Set posts by the chosen method—surface-mounted, face-mounted, embedded, or core-drilled—coordinated with block courses.
Infill panels, caps, and final grading
- Fit panels and hardware; verify straight lines and consistent spacing along the top.
- Add caps to blocks and to post tops for a finished look and weather protection.
- Backfill in lifts, compact, then grade to shed water away from the base.
- Integrate pavers, steps, or landings to join patios and paths smoothly.
- Complete a final walkthrough to confirm level surfaces, tight joints, and clean transitions behind wall features.
Result: a durable build retaining wall system with neat panels and long service life when base work, drainage, and cap details are done right. Schedule an on-site review to align the project with site soils and local code before work begins.
Common mistakes to avoid when you build retaining wall systems
A few common mistakes can turn a good design into an expensive problem. Anchored Construction helps homeowners avoid those errors with simple checklists and experienced oversight.
Plan the base and drainage first. Poor compaction and missing drain pipe let water build pressure. That causes settlement, leaning, and early failure.
Avoid mounting posts directly into modular units without a certified anchoring method. Doing so shifts loads to the face units and shortens service life.
- Skip base compaction and you risk uneven settlement.
- Omit a fabric-wrapped drain and hydrostatic pressure will form.
- Attach posts without proper anchors and face units may crack.
- Underestimate wind loads; tall barriers need stiffer supports.
- Ignore property lines or utilities and the project can halt.
- Choose mismatched materials; finishes weather differently.
- Fail to order extra units and the job stalls when adjustments arise.
- Use cheap fasteners or no coatings; corrosion causes callbacks.
- Skip expansion joints or cap adhesives where system requires them.
- Block access to drains and you lose maintenance options later.
Tip: Order spare units and quality fasteners before work starts. Small upfront costs prevent bigger repairs later. Schedule an on-site review to align details with soils, codes, and long‑term performance.
Maintenance tips to extend the life of your wall and fence
Seasonal checks catch clogged drains and loose components before damage spreads. Anchored Construction offers simple steps homeowners can use to protect their investment for decades.
Inspect drains, joints, and caps regularly
Blocked drains are a leading cause of failures. Schedule seasonal checks of drains and outlets to keep water moving away from walls.
Look at caps and joints for gaps. Reset, re-adhere, or tighten as needed to keep water out.
Sealants, vegetation control, and timely repairs
Trim plants so roots do not disturb the base. Keep soil and mulch away from posts to preserve materials and footing.
- Clean surfaces with manufacturer-approved methods to maintain a fresh look without damage.
- Recoat sealants where appropriate to slow staining and chipping on stone or brick finishes.
- Keep gravel drain zones free of silt to preserve flow and reduce hydrostatic pressure.
- Verify hardware tightness on fences and replace worn parts before failure.
- Watch for early movement or settlement and address small issues promptly.
Tip: Maintain a clear access path along the property so inspections and minor work are easy. Use the yard responsibly near edges to avoid excessive loads in winter.
Why East Tennessee property owners trust Anchored Construction
Decades of hands-on experience turn complex site problems into straightforward solutions. Founded in 2000 by Knoxville native Travis Bullington, Anchored Construction & Restoration blends local roots with proven methods.
Local expertise: The team knows Knoxville soils, drainage challenges, neighborhood standards. That knowledge keeps each project on schedule while protecting your budget.
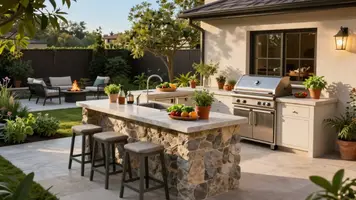
Full-service approach: Design, excavation, build, repair. Services cover concrete, hardscape, decks, outdoor kitchens, retaining wall construction, pavers, landscape work and warehouse projects.
- Coordinate wall fences with pavers, steps, plants to shape usable space.
- Consistent project management and clean jobsite practices.
- Quality checks at each phase to ensure durable, attractive results.
Why it matters: Experienced crews use modern interlocking block systems and proper equipment to solve challenges fast. Homeowners get thoughtful design that raises curb appeal and extends yard value. Call to learn how a planned approach protects timelines while delivering lasting work.
Get expert help on your project today
Get expert guidance early to avoid surprises and keep your outdoor upgrade on schedule. Combining a retaining wall fence with related features requires careful planning for loads, drainage, and code compliance.
Call (865) 316-6933 or email Info@anchoredconstructiontn.com for a fast site visit and clear proposal.
Contact and services
- Design and build: retaining wall fence solutions tailored to each property.
- Related work: deck building, concrete services, landscape, outdoor kitchen design, hardscape, warehouse builds, pallet racking, bobcat and excavation.
- Bundle options: add pavers, steps, or planters for cohesive outdoor space.
How Anchored Construction helps
The team schedules a site review to discuss goals, budget, and timeline. They outline a clear scope, provide transparent pricing, and keep steady communication to reduce stress.
- Safe, efficient work with the right tools and crew.
- Repair options to extend the life of aging installations.
- Flexible scheduling to fit family routines and weather windows.

Conclusion
Durable outdoor systems depend on careful design and attention to small details.
Successful outcomes pair the right retaining wall with a compatible fence in a coordinated system. Plan lines, levels, material choices, and drainage first.
Use fabric-wrapped pipe and clean gravel to reduce hydrostatic pressure. Choose modern interlocking blocks and certified mounting methods for secure connections.
Follow guard rules for any wall over 30 inches to protect people. Routine checks of caps, drains, and hardware extend service life.
Anchored Construction & Restoration invites you to discuss your project, site goals, and timing. Call (865) 316-6933 or email Info@anchoredconstructiontn.com to start planning a safe, attractive solution for your property and yard.