Have you ever wondered what separates a sidewalk that lasts decades from one that needs constant repairs?
Anchored Construction & Restoration answers that with clear planning and steady craftsmanship. The team, led by Knoxville native Travis Bullington, brings more than 25 years of experience to every project. They combine local knowledge with practical steps to protect your property and timetable.
Proper slope, a compacted base, and correct thickness are core to long-term performance. Anchored Construction follows standards like a 1/4 inch per foot slope away from structures, a 2–4 inch gravel base, and thicker sections near drive transitions. The company also handles hardscapes, retaining walls, decks, outdoor kitchens, and excavation work for full-site coordination.
Expect clear communication about permits, form layout, joint spacing, and curing times. You will know when to walk on new slabs and when to wait for full strength. For a site visit or estimate, call (865) 316-6933 or email Info@anchoredconstructiontn.com.
Key Takeaways
- Anchored Construction & Restoration brings local expertise and 25+ years of experience.
- Durable sidewalks begin with proper slope, a compacted base, and right thickness.
- Planning reduces delays, change orders, and cost overruns for your property.
- Professional joint spacing and curing prevent common failures in East Tennessee soils.
- Contact Anchored Construction for site visits, designs, and precise estimates.
Why Knoxville Property Owners Trust Anchored Construction for Sidewalks
Local experience matters—especially when planning paths that must endure years of weather and use.
Founded in 2000, Anchored Construction & Restoration is led by Knoxville native Travis Bullington. The team serves Knoxville and surrounding areas in East Tennessee with concrete and hardscape solutions. Owners get clear timelines, practical guidance, and calls answered quickly.
The crew plans each project to protect your property and reduce surprises. Teams locate utilities, set access routes, and stage materials to limit disruption. Workers also protect landscaping and irrigation while forming and pouring.
- Over 25 years of local field experience for residential and commercial sidewalks.
- Scheduling protects curing days so the mix reaches design strength.
- Easy contact: (865) 316-6933 or Info@anchoredconstructiontn.com for a walkthrough and proposal.
Proper curing lets the slab accept foot traffic after 24–48 days and reach full strength at about 28 days when kept moist. Anchored provides simple maintenance tips so results last in Knoxville’s climate.
Understanding concrete sidewalk construction
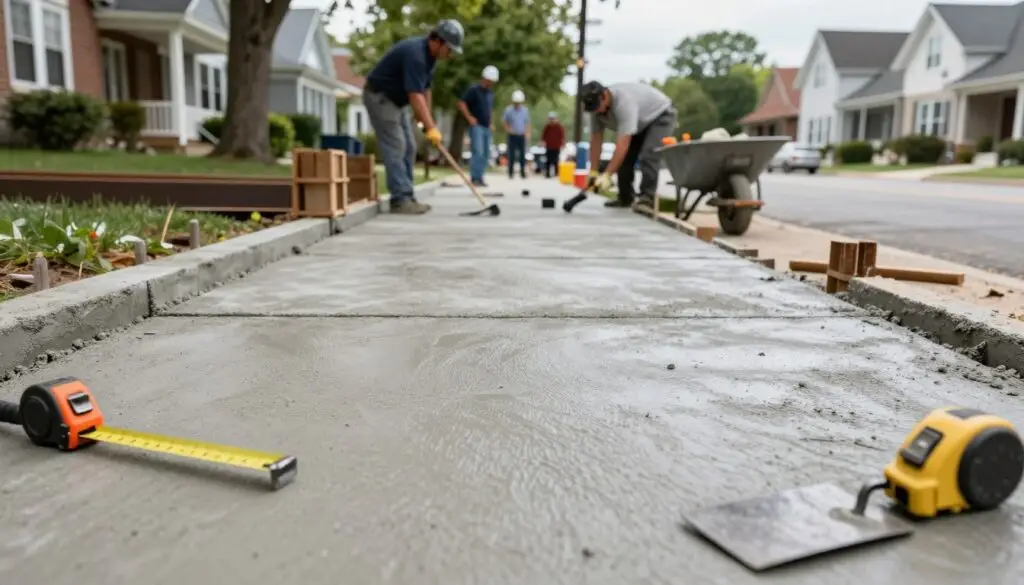
A well-built path is the result of careful layout, proper base work, and smart finishing. Anchored Construction & Restoration educates homeowners so you can make informed choices about value, schedule, and long-term performance.
Pro sequence and typical timelines:
- Layout and excavation: set lines, remove material to match slab and base depths.
- Compact and place gravel base, then set forms and alignment.
- Place concrete, screed, float, add control joints, edge, and cure.
Tools matter. Screed boards level the pour. Bull and magnesium floats smooth the surface. Edgers, groovers, and plate compactors refine edges and density. Knowing the tool purpose helps you spot quality work.
Moist curing for 3–7 days boosts durability. Typical walk-on time is 24–48 hours. Full strength arrives near 28 days. Anchored ties each step and choice of materials back to professional standards residents trust in Knoxville.
Plan first: permits, utilities, and local codes in East Tennessee
Permits, utility checks, and a solid site plan set every project up to succeed. Early coordination reduces delays and protects neighbors and public right-of-way. Anchored coordinates permitting guidance and utility marking with clients so you stay informed.
Call 811 before any excavation. Mark the layout with string lines and stakes to visualize width, alignment, and transitions. Typical paths in these areas run 3–4 ft, and slope should be about 1/4 inch per foot away from buildings to control runoff.
- Start with a site review for property lines and right-of-way limits.
- Confirm permits and inspections early and plan for lead times.
- Include staging and safe pedestrian detours in the process.
Anchored helps assemble documentation so inspections go smoothly. Good planning cuts rework, improves ordering accuracy, and keeps the concrete pour on schedule for a durable sidewalk.
Layout and slope strategy for long-lasting sidewalks
A precise layout and true slope make the difference between a path that performs and one that fails. Anchored uses clear practices to protect drainage and reduce trip hazards while keeping the look cohesive with the property.
String lines, stakes, and common widths
Most paths run 3–4 ft and start with snapped string lines. Stakes hold elevations so edges stay straight and consistent.
Set the proper fall: 1/4 inch per foot
Confirm a target slope of about 1/4 inch per foot to move water away from structures. Preliminary forms check that the path stays level across its width while keeping the fall toward the yard.
- Snap string lines to define the route and consistent width.
- Place stakes at key points to maintain string elevation and the required slope.
- Set and verify forms level at transitions to avoid dips and ponding.
- Document measurements and anchor layout in stable ground before excavation.
Accurate layout reduces grinding or patching later and improves finish quality. It also guides the pour of concrete and each safe step for access.
Excavation and soil preparation for a stable base
Good subgrade work starts long before any form boards go up. Anchored’s bobcat and excavation services shape the site and limit mess. Teams protect landscaping while keeping the area tidy.
Plan the depth so the trench fits a 2–4 inch compacted gravel base plus a 4-inch concrete slab. Remove sod, roots, and organic matter so the soil below is firm and compactable.
Shape the subgrade to follow the intended slope. Compact the soil to reduce settlement. Verify uniform depth along the path before placing gravel.
- Mark limits and excavate the area to planned depth.
- Over-excavate soft spots and backfill with compactible material.
- Keep stockpiles clear of edges and maintain safe equipment access.
- Finish with a clean trench ready for gravel placement and compaction.
Anchored hauls spoil off-site responsibly and leaves a tidy work zone. The final step is a stable, shaped trench that supports the slab and helps prevent future cracking.
Build a compacted gravel base that drains and supports
Start with the ground — a compacted layer of stone prevents many common failures. Anchored emphasizes subgrade and base quality to protect the investment and reduce future maintenance.
Recommended gravel depth
2–4 inches compacted
Place 2–4 inches of crushed gravel or stone. Spread it evenly so the slab keeps a uniform thickness and the planned slope stays true.
Plate compactor vs. hand tamper
Use a plate compactor for consistent density across open runs. Use a hand tamper in tight corners and around forms.
Why not pour on dirt
Pouring directly on soil traps moisture and lets the ground shift. That movement leads to cracks and early repairs.
- Spread crushed gravel evenly to the specified inches for uniform support.
- Compact with a plate compactor; hand-tamp where the plate won’t reach.
- Verify elevations to preserve drainage and avoid low spots under the slab.
- Keep edges clean so forms seat tight and utilities are secured in the base.
- Final compactor passes must leave no footprints or loose aggregate on the surface.
Forms that hold true: boards, stakes, alignment, and release
Straight, stable forms set the stage for an accurate pour and crisp edges. Anchored’s carpentry skills deliver clean lines that elevate curb appeal and make the next step easier for the crew.
Use 2×4 or 2×6 boards sized to match slab thickness and the desired edge profile. Drive stakes every 2–3 feet and brace corners so the length of each run resists bowing under pressure.
Before the pour, confirm forms level across the width while keeping the planned slope along the path. Check diagonal measurements to ensure square corners and alignment with nearby structures.
- Choose form board sizes to match slab depth and finish.
- Drive stakes every 2-3 feet and brace corners to prevent movement.
- Confirm forms level and maintain longitudinal slope for drainage.
- Apply a light form release to protect edges and simplify strip-out.
- Re-inspect fasteners and stakes before pour day to avoid surprises.
Choosing the right concrete mix, thickness, and reinforcement
Selecting the correct materials and section details prevents early cracking and costly repairs. Anchored helps homeowners match specifications to budget and expected use. The right choices boost durability and reduce maintenance over time.
A standard 4-inch slab is appropriate for typical pedestrian use. Increase the thickness to 6 inches at drive aprons or where vehicle loads transition onto the path.
Most sidewalks use a 4000 psi mix for adequate long-term strength. Select a mix tailored to local freeze-thaw cycles and workability needs. Specify air-entrainment if freeze exposure is likely.
Reinforcement options and practical steps
- Select fiber or wire mesh to reduce shrinkage cracking and spread stresses across the slab.
- Consider deformed bars at transitions and high-load spots instead of only mesh.
- Verify inches of cover over reinforcement so steel remains protected from corrosion.
- Match aggregate size to section depth for proper consolidation around forms and edges.
- Plan delivery and crew timing—higher cement mixes set faster and can create cold joints if delayed.
Anchored will guide reinforcement choices without overspecifying. The final step is confirming order quantities and a small contingency for waste and spillage so the project flows smoothly.
Tools and materials checklist for a smooth project
Well-planned gear and deliveries keep crews focused and quality high. Anchored organizes tools and material stages so the workday runs without surprise. This approach reduces downtime and helps the team protect the new sidewalk and surrounding areas.
Keep a compact, ordered list on site. Verify items a day ahead. Confirm delivery times and quantities to avoid missed pours or extra trips.
- Prepare compaction, placement, finishing, and jointing equipment. Include a screed board for straight leveling.
- Stage a quality magnesium or bull float for the initial finish; have a stiff-bristle broom for final texture.
- Keep hand tools like edgers and groovers clean and ready to shape joints and edges crisply.
- Stock wood stakes, screws, and braces to hold forms under load during the pour.
- Have 4-mil plastic for curing and weather protection and confirm mesh, expansion strip, and tie wire if reinforcement is specified.
Safety and flow matter. Organize wheelbarrows, a wash-out area, and PPE so cleanup and a final step go smoothly. A complete checklist protects quality and saves time.
Mixing and delivery options: ready-mix, on-site, and workflow
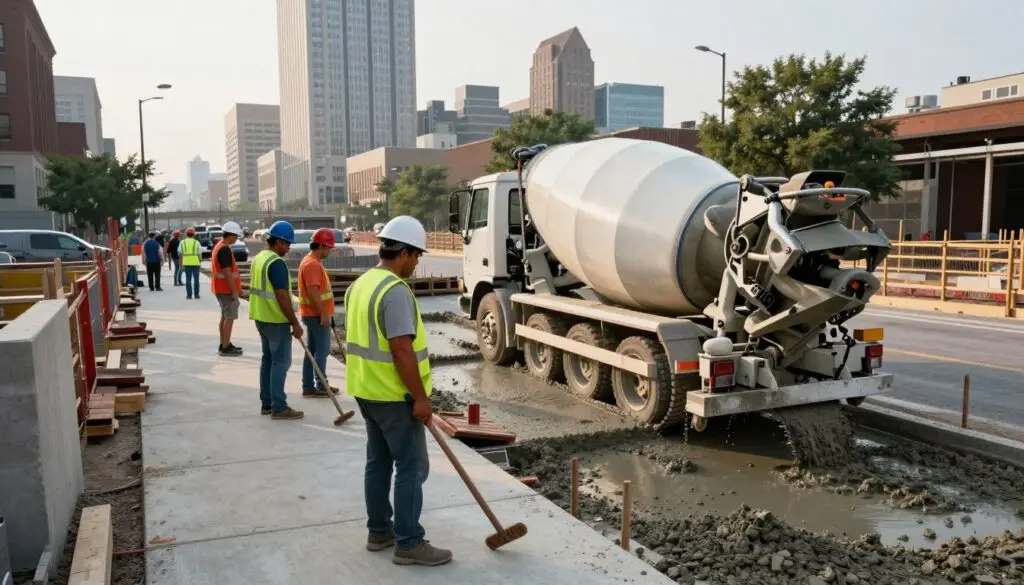
A reliable pour starts with matching delivery choice to site access and schedule. Anchored evaluates whether a ready-mix truck or on-site batching best fits the job.
Control the mix and placement momentum. Ready-mix gives consistent quality and reduces on-site handling. Small jobs may need short loads or on-site batching, but those can carry extra fees and time risks.
Keep added water to a minimum. Extra water alters slump and lowers final strength. Communicate required slump to the driver before arrival to avoid adjustments on the fly.
- Choose delivery that matches project size and access for cost and quality control.
- Coordinate truck arrival with crew readiness to start placement immediately.
- Plan a clear placement path for wheelbarrows or chutes to prevent spills and delays.
- Avoid batching gaps to prevent cold joints between loads.
- Keep backup tools ready for minor clogs or flow interruptions to keep each step on track.
Anchored’s scheduling minimizes waiting, protects finish windows, and reduces rework. Proper coordination saves time and preserves slab performance.
Placement best practices: fill, distribute, and avoid voids
Start at a clear point and move methodically so each pass builds a solid mass. Begin at the high end and proceed along the length to keep control of flow and elevation.
Anchored’s crews place material to reduce segregation and get uniform density across the slab. They distribute with shovels and rakes, slightly overfilling so a single screed pass evens highs and lows.
Rod or tap boards and edges to release trapped air. This tightens the paste against forms and prevents voids. Keep a steady pace so finishing starts on schedule with consistent surface conditions.
- Begin at the high end and work the full length to maintain elevation control.
- Fill the area evenly to keep aggregates distributed and reduce segregation.
- Slight overfill aids screeding; minimal reworking avoids excess bleed water.
- Coordinate rakes and shovels so reinforcement and isolation strips stay undisturbed.
- Verify thickness periodically to ensure the slab meets specification across the area.
Monitor edge straightness, especially at transitions and curves, to preserve clean lines. This step sets up a level, compacted mass ready for screeding, floating, and the next step in a quality sidewalk pour.
Screeding, floating, and finishing the surface
A careful finish turns a fresh pour into a durable, slip-resistant walking route. This step balances smooth results with traction for family use and guest safety.
Level with a straight board. Use a flat screed board and a steady back-and-forth sawing motion to strike off excess material and set the correct elevation.
Follow immediately with a magnesium or bull float to close the surface and remove ridges. That float pass pushes paste up and leaves the slab ready for the next step.
Hand timing and broom finish
Wait until bleed water disappears and the surface sheen dulls before any hand trowel work. Doing hand passes too soon traps water and weakens the top layer.
Edge the perimeter to compress and strengthen borders. Apply a light to medium broom finish for traction, aligning strokes with drainage so water sheds properly.
- Use a flat screed board to level the slab with a steady sawing motion.
- Follow with a magnesium or bull float to close the surface and remove ridges.
- Wait for bleed water to clear before hand trowel passes to protect the top layer.
- Edge borders and apply a broom finish for slip resistance, matching stroke direction to drainage.
- Monitor time windows so each pass hits the right firmness and avoids overworking.
This step delivers a smooth, uniform surface and reduces the need for grinding later. Anchored balances finish quality with safe traction so paths age well and stay useful.
Control joints, expansion, and clean edges
Effective joint layout is a small step that prevents large repairs later.
Anchored plans joint locations before the pour so panels match the length and expected movement. This reduces random cracking and keeps the finish uniform.
Joint spacing: Space control joints every 4–6 ft or at 2–3 times the width. Consistent spacing manages shrinkage and temperature movement across each slab panel.
Saw-cut vs. hand groover: Use a hand groover during finishing for quick panels. Or saw-cut after initial set for crisp lines. Make joints at least one quarter of the slab thickness to act as a reliable crack guide.
Edges and durability: Edging compacts margins and reduces chipping from foot and cart traffic. Coordinate expansion or isolation joints at fixed structures, steps, and driveways to protect transitions.
- Lay out control joints to divide panels evenly along the length.
- Choose groover or saw-cuts and mark planned cuts on forms.
- Cut to at least 1/4 slab depth and align joints with corners and direction changes.
- Use an edger to densify margins and prevent spalling.
- Execute cuts early enough to prevent random cracks and maintain visual uniformity.
Curing time, weather protection, and when to use the sidewalk
Proper curing is the quiet step that keeps a new path from cracking and losing strength. Begin protection immediately after finishing to slow evaporation and lock moisture into the surface.
Moist curing with plastic or compound
Keep the slab damp for at least 3 days. Seven days is ideal when weather is warm or windy.
Use plastic sheeting or a curing compound to hold water at the surface and reduce shrinkage. Check edges and joints first; they often dry faster and need extra care.
When to walk and full strength timeline
Light foot traffic is usually safe after 24–48 hours. Avoid loads or heavy use until near 28 days.
With good curing, the slab reaches designed strength around 28 days. Plan access routes so people avoid the new path during early strength gain.
- Begin curing immediately after finishing to lock in moisture and slow evaporation.
- Use plastic or a curing compound to keep water at the surface.
- Adjust protection for hot sun, wind, or rain to preserve the finish.
- Keep people off the area for the recommended days and post simple markers if needed.
- Avoid de-icing salts the first winter and schedule sealing only after adequate cure.
Drainage, site constraints, and property-specific solutions
Good drainage planning starts with a close look at how water moves across your lot. Anchored tailors designs to unique grades, trees, utilities, and hardscape features on your property.
Proper slope of about 1/4 inch per foot away from buildings, a compacted base, and thoughtful routing around obstacles keep water away from doors and plantings. These steps protect adjacent areas and reduce long-term maintenance.
Where grades do not cooperate, Anchored uses grading adjustments or swales to move runoff naturally. The team also plans winter runoff paths so meltwater does not refreeze across walking areas.
- Evaluate site grades and obstacles to route the sidewalk where drainage works naturally.
- Protect roots and utilities with careful excavation and adjusted base depth.
- Choose panel sizes and curves that fit tight areas without compromising structure.
- Tie elevations into steps and driveways to eliminate trip points and improve flow.
- Use thicker base or added reinforcement where soils are weak for long-term stability.
Anchored provides practical, code-aligned solutions so the new concrete path works with your property rather than against it. The result is a durable route that handles water and fits your landscape.
Common mistakes to avoid and how to fix them
Small installation errors often cause the biggest headaches later on. Anchored educates homeowners so problems are easier to spot and fix.
Frequent causes: skipping a proper base, incorrect slope, missing or too-shallow joints, and allowing the surface to dry too quickly. Each of these reduces long-term performance and raises repair costs.
- Inadequate base: leads to settlement and cracking. Remedy by removing soft spots, adding quality material, and recompacting to spec.
- Poor slope: causes ponding. Small highs can be ground down; larger issues need panel replacement to restore proper fall.
- Missing or shallow joints: let random cracks form. Add saw-cut control joints or replace affected panels and set proper depth.
- Early drying of the surface: weakens the top layer. Use resealers or overlays if caught early; replace badly scaled areas.
Other causes and quick fixes: adding too much water lowers strength—stick to the specified slump. Moving forms during placement causes edge defects; brace and retighten before pour. Finishing over bleed water traps moisture; wait for the sheen to dull.
Anchored reviews issues on site and recommends the most cost-effective repair. Their team prioritizes fixes that restore durability and control future risk so the path performs for years.
When to call Anchored Construction for pro results
When a project needs reliable results and clear scheduling, call the pros who plan every step. Anchored Construction & Restoration steps in when site limits, timeline pressures, or scope make DIY risky. The team coordinates permits, utility locates, and form layout so work flows without surprise.
From concrete and hardscapes to excavation and retaining walls
Anchored offers concrete services, hardscape installation, retaining walls, decks, outdoor kitchens, and bobcat/excavation work. Crews use plate compactors and excavation tools to speed prep and protect the base.
Serving Knoxville and East Tennessee since 2000
Founded by Travis Bullington, the team understands local areas and weather. They plan curing days, place joints at 4–6 feet, and maintain surface moisture for early-age strength.
Get a quote: (865) 316-6933 – Info@anchoredconstructiontn.com
- Call when site constraints or schedule make the job complex.
- Anchored manages layout, utilities, and equipment so your project stays on track.
- Request a site visit for a clear estimate and a single point of contact.
Conclusion
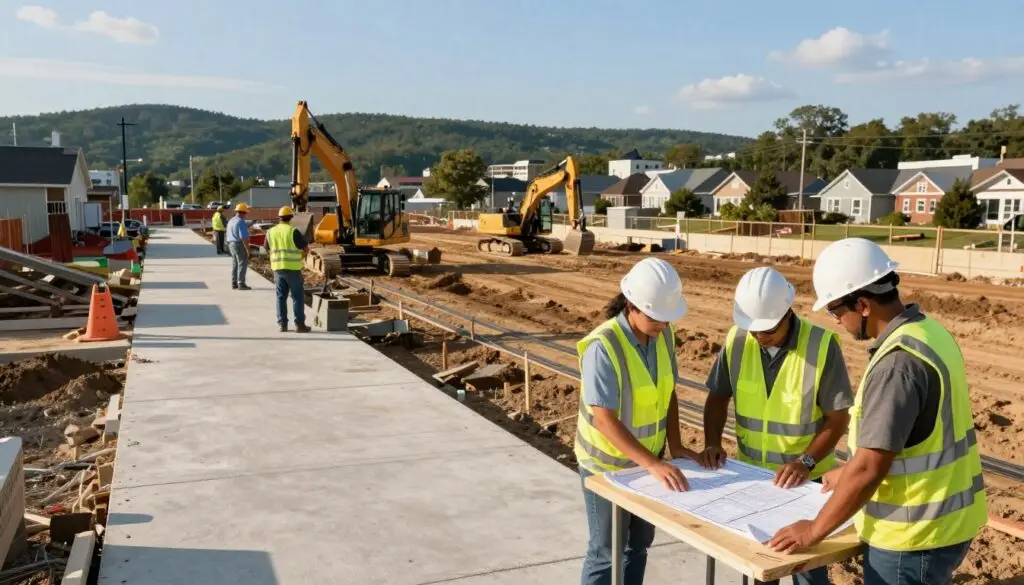
Every successful project follows a simple chain: plan well, execute each step, then protect the finish. Anchored Construction & Restoration focuses on education, craftsmanship, and care for East Tennessee homeowners.
The full process—from layout, excavation, and a compacted base to forms, placement, screeding, joints at 4–6 ft, edging, and proper curing—ensures long length and reliable performance. Accurate joints and several days of curing guide cracking the right way.
This approach gives you a clear way from idea to finished path. For a site review and a straightforward way forward, call (865) 316-6933 or email Info@anchoredconstructiontn.com.